
Nothing captures the magic of winter quite like a bowl of homemade snow cream. This nostalgic dessert, made with freshly fallen snow, milk, sugar, and vanilla, is a childhood favorite that turns a simple snowfall into a sweet delight. With just a few ingredients and minutes to prepare, this snow cream recipe is the easiest way to enjoy a frosty, creamy treat. Plus, it’s fully customizable—add chocolate, fruit, or even a dash of cinnamon for a unique twist. Whether you’re reliving childhood memories or introducing this classic to a new generation, making snow cream at home is the perfect winter tradition.
Snow cream is a nostalgic, homemade dessert that brings back childhood memories. Not only is it quick and easy to make, but it’s also highly customizable with different flavors. Whether you prefer classic vanilla, chocolate, or something fruity, this winter treat is sure to satisfy. Best of all, it’s a perfect way to enjoy a snowy day with family. In this guide, we’ll explore everything from its origins to step-by-step instructions, flavor variations, and pro tips to make the perfect snow cream.
What Is Snow Cream? A Classic Winter Treat
For generations, now cream has been a winter tradition for generations, offering a simple yet delightful way to enjoy freshly fallen snow. Unlike regular ice cream, it requires no churning or freezing, making it an instant treat. Across cultures, snow-based desserts vary; for example, Japan’s shaved ice is similar but uses flavored syrups. Similarly, Nordic countries have their own versions using condensed milk or fruit purees.
The Key Ingredients That Make Snow Cream Unique
A classic snow cream recipe includes just a handful of ingredients:
- Fresh, clean snow – The base of this dessert, providing a light and airy texture.
- Milk or cream – Adds creaminess and richness to the mixture. Some prefer sweetened condensed milk for an extra indulgent flavor.
- Sugar – Enhances the sweetness, though honey or maple syrup can also be used.
- Vanilla extract – A classic addition that brings warmth and depth to the flavor.
- Optional mix-ins – Chocolate syrup, fruit purees, sprinkles, or even a dash of cinnamon can elevate the taste.
Because snow cream is highly customizable, families often create their own signature flavors, from chocolate to caramel-infused variations. Some even add a splash of fruit juice or coffee for an unexpected twist.
Snow-Based Desserts Around the World
While traditional snow cream is popular in many snowy regions, variations of snow-based desserts exist worldwide:
- Japan – Kakigori: A finely shaved ice dessert topped with sweet syrups, condensed milk, and fruit.
- Korea – Bingsu: Similar to kakigori but richer, featuring ice cream, condensed milk, and toppings like red bean paste or mochi.
- Italy – Granita: A semi-frozen dessert made from water, sugar, and fruit flavors, offering a refreshing icy texture.
- Mexico – Raspados: Shaved ice flavored with syrups, often topped with fresh fruit and condensed milk.
These global treats highlight the universal love for icy, refreshing desserts, but what makes snow cream special is the joy of creating it fresh from nature. It’s not just about the taste—it’s about the experience of scooping up fresh snow and transforming it into something delicious.
Ingredients & Tools You Need for the Perfect Snow Cream
Making homemade snow cream is incredibly simple, requiring just a few essential ingredients and basic kitchen tools. Whether you prefer the classic version or want to experiment with flavors, having the right ingredients and tools ensures the perfect texture and taste.
Essential Ingredients for Classic Snow Cream
To create the perfect snow cream, you’ll need:
- Fresh, clean snow – The key ingredient! Be sure to collect fresh, untouched snow from a safe, clean surface.
- Milk or non-dairy alternative – Whole milk, heavy cream, almond milk, coconut milk, or condensed milk work well to add creaminess.
- Sweetener – Granulated sugar is traditional, but you can also use honey, maple syrup, or even powdered sugar for a smoother texture.
- Vanilla extract – A must-have for classic flavor, enhancing the sweetness with a warm, comforting aroma.
Optional Add-Ins for Extra Flavor
If you love variety, customize your snow cream with these tasty mix-ins:
- Chocolate syrup or cocoa powder – For a rich, chocolaty twist.
- Fruit purees or fresh fruit – Strawberries, bananas, or berries add a refreshing, natural sweetness.
- Nuts and sprinkles – A crunchy topping for added texture.
- Condensed milk – Creates a thicker, creamier consistency and enhances sweetness.
- Spices like cinnamon or nutmeg – A warm, aromatic boost to your dessert.
Tools Needed for the Perfect Snow Cream
You won’t need any fancy equipment, just a few basic tools:
- Large mixing bowl – For combining ingredients and stirring with ease.
- Whisk or spoon – Helps blend the milk, sugar, and vanilla before adding the snow.
- Measuring cups and spoons – Ensures the right balance of ingredients.
- Ice cream scoop or regular spoon – For serving the snow cream beautifully.
By having these ingredients and tools ready, you’ll be able to whip up a delicious bowl of snow cream in minutes! Whether you stick with the classic recipe or experiment with flavors, this winter treat is all about fun and creativity.
Step-by-Step Guide – How to Make Snow Cream at Home
Making homemade snow cream is quick, fun, and easy! Follow these simple steps to create a delicious winter treat in just a few minutes.
1: Collect Fresh, Clean Snow Safely
- Wait until fresh snowfall has accumulated to ensure clean and fluffy snow.
- Use a large bowl or container to scoop up the top layer of fresh, untouched snow.
- Avoid collecting snow from the ground, roadsides, or areas exposed to contaminants.
- If snowfall isn’t fresh, you can freeze shaved ice as an alternative.
2: Mix Ingredients for the Perfect Consistency
- In a mixing bowl, combine 1 cup of milk (or non-dairy alternative), ¼ cup sugar, and 1 teaspoon vanilla extract.
- Stir the ingredients together until the sugar dissolves completely.
- Gradually add about 6–8 cups of fresh snow, stirring gently to create a light, fluffy texture.
- Adjust the consistency by adding more snow for thickness or a splash of milk for creaminess.
3: Customize Flavors and Textures
- Chocolate lovers can mix in cocoa powder or drizzle chocolate syrup.
- Add fruit puree or fresh fruit pieces for natural sweetness.
- Sprinkles, crushed cookies, or chopped nuts add extra crunch.
- A dash of cinnamon, nutmeg, or peppermint extract creates a seasonal twist.
4: Serve Immediately for the Best Taste and Texture
- Snow cream melts quickly, so serve it right away in bowls or cones.
- If needed, briefly freeze for a firmer texture before serving.
- Top with whipped cream, caramel drizzle, or extra toppings for a picture-perfect dessert.
To make delicious snow cream, start with clean, freshly fallen snow. If you prefer a richer texture, consider using condensed milk instead of regular milk. Additionally, having the right tools—like a whisk and a large mixing bowl—makes the process easier. For those who love experimenting, toppings such as chocolate chips or caramel sauce can take this dessert to the next level.
Enjoy your homemade snow cream as a nostalgic, fun-filled treat that brings out the joy of winter!

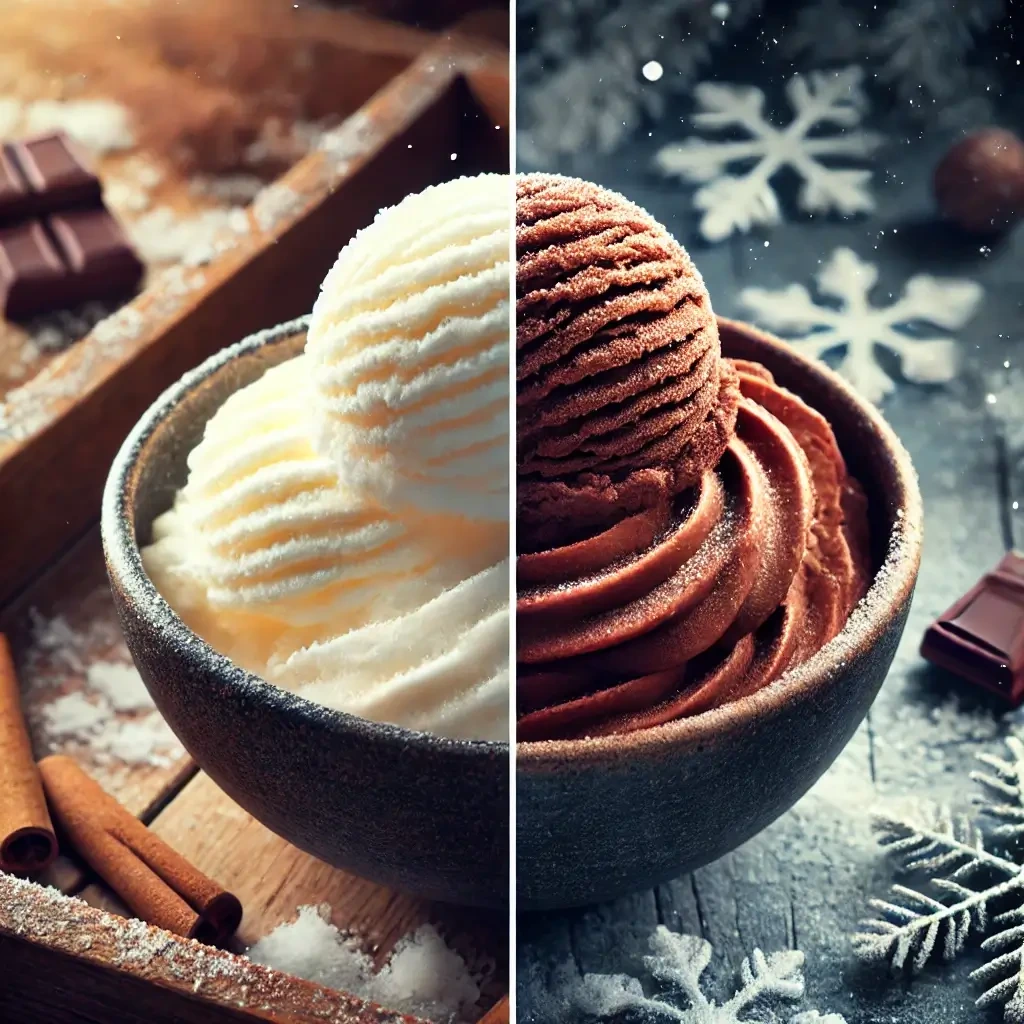
Fun Variations & Flavor Twists for Your Snow Cream
Snow cream is a blank canvas for creativity, allowing you to experiment with different flavors, textures, and mix-ins. Whether you prefer classic, dairy-free, or festive flavors, here are some exciting ways to customize your snow cream.
Classic vs. Creative Flavor Twists
- Classic Vanilla: A simple yet timeless option made with fresh snow, milk, sugar, and vanilla extract.
- Rich Chocolate: Mix in cocoa powder or drizzle melted chocolate for a deeper, decadent taste.
- Fruity Delight: Blend in pureed strawberries, bananas, or mangoes for a refreshing twist.
- Coffee Lover’s Dream: Stir in cold brew coffee or espresso powder for a caffeinated treat.
Dairy-Free & Vegan-Friendly Options
- Almond Milk Snow Cream: A light, nutty alternative for a dairy-free version.
- Coconut Milk Snow Cream: Adds a rich, tropical flavor and pairs well with chocolate or fruit.
- Oat Milk or Cashew Milk Variations: Provides a creamy consistency without dairy.
- Maple or Agave Sweetened: Swap white sugar for maple syrup, agave, or coconut sugar for a natural sweetener.
Crunchy Toppings & Mix-Ins
- Nuts: Chopped almonds, pecans, or walnuts for added crunch.
- Sprinkles: Colorful sprinkles or edible glitter for a fun, festive touch.
- Crushed Cookies: Oreos, graham crackers, or shortbread pieces for extra flavor.
- Shredded Coconut or Granola: Adds texture and enhances the overall taste.
Festive Holiday-Inspired Flavors
- Peppermint Wonderland: Stir in crushed candy canes and a drop of peppermint extract.
- Cinnamon Spice: A warm, cozy blend of cinnamon, nutmeg, and brown sugar.
- Eggnog Snow Cream: Swap milk for eggnog, and add a hint of vanilla and nutmeg.
- Pumpkin Spice: A fall-inspired treat with pumpkin puree, cinnamon, and cloves.
With endless flavor possibilities, snow cream can be a fun, personalized dessert for any season. Which variation are you excited to try first?

Pro Tips for the Best Snow Cream Experience
Creating perfectly creamy, flavorful snow cream requires a few expert tricks. Follow these pro tips to ensure the best texture, taste, and overall experience!
1. Use Fresh, Clean Snow for the Best Results
- Collect snow right after a fresh snowfall to ensure it’s clean and fluffy.
- Avoid areas near roads, rooftops, or surfaces where contaminants may settle.
- If you’re unsure about snow quality, place a large bowl outside during snowfall to catch it directly.
- As an alternative, you can crush ice in a blender to mimic snow’s texture.
2. Balance Ingredients for a Creamy, Not Icy, Texture
- Add liquid ingredients slowly to prevent the snow from melting too quickly.
- Use cold milk or dairy-free alternatives (almond, coconut, or oat milk) to maintain consistency.
- If the mixture becomes too icy, stir in a small amount of condensed milk or heavy cream for extra creaminess.
- Mix gently—over-stirring can break down the fluffy texture, making it watery.
3. Storing Snow Cream – Can You Keep It for Later?
- Snow cream is best enjoyed immediately since it melts quickly.
- If you must store it, freeze in an airtight container for up to a few hours.
- Revive frozen snow cream by stirring in a little milk or cream before serving.
- Avoid long-term freezing—refrigerated or frozen snow cream tends to become icy and loses its smooth texture.
4. Make It a Fun, Family-Friendly Tradition
- Let kids mix in their favorite flavors and toppings for a creative treat.
- Serve in cones, bowls, or even between cookies for a snow cream sandwich.
- Turn it into a science experiment by teaching kids how snow melts when mixed with ingredients.
- Make themed snow cream for holidays and celebrations, using colorful syrups or festive toppings.
Instead of: Use cold milk to keep the snow from melting. If it becomes too icy, add condensed milk. Try: Use cold milk to keep the snow from melting. However, if it becomes too icy, adding condensed milk can help restore creaminess.
By following these tips, you’ll master the art of homemade snow cream while making lasting winter memories!
Conclusion
Making homemade snow cream is a simple, fun, and nostalgic way to enjoy winter. With just a few basic ingredients, you can create a delicious, customizable treat that the whole family will love. Whether you prefer classic vanilla, rich chocolate, or festive flavors, snow cream is the perfect quick and easy dessert for snowy days.
Don’t be afraid to get creative—try different flavors, dairy-free alternatives, and fun toppings to make it your own!
What’s your favorite snow cream flavor? Let us know in the comments below!
For more winter dessert inspiration, check out our Easy Homemade Hot Chocolate Recipe.
Want to learn more about traditional snow-based desserts around the world? Read this Food Network.